 |
 How to install incadea Automotive365 Network Management Publisher
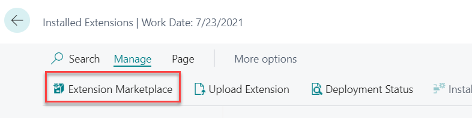
| 1. | Install the app from https://appsource.microsoft.com/en-us/marketplace/apps?product=dynamics-365-business-central or Search for Extension Management and on the page Installed Extensions, click , where you can then search for the extension.
| ||
| 2. | The permission set should be assigned to the users, who will work with this app. |
 | A RapidStart Package, which sets up default values, can be run by your IT department or requested by us if needed. |
Setup Service to service authentication (OAuth2)The publisher extension is exposing REST APIs that are consumed by the subscribers. Thus, the subscribers need to connect and authenticate to the APIs. Since bacis authentication (Web Service Key) is deprecated on Business Central for SaaS, the publisher extension uses Service to service authentication (OAuth2).
The setup of authentication is a three-step process to be done by an Azure Active Directory administrator:
| 1. | Register the application in Azure Active Directory.
| ||||||
| 2. | Create the Azure Active Directory Application in Business Central. | ||||||
| 3. | Grant consent. |
For further information please see the official documentation from Microsoft: Using Service-to-Service (S2S) Authentication
Register the Application in Azure Active DirectoryTo create the application in AAD you need to perform the following procedure:
| 1. | Go to Azure Portal. | ||||||||
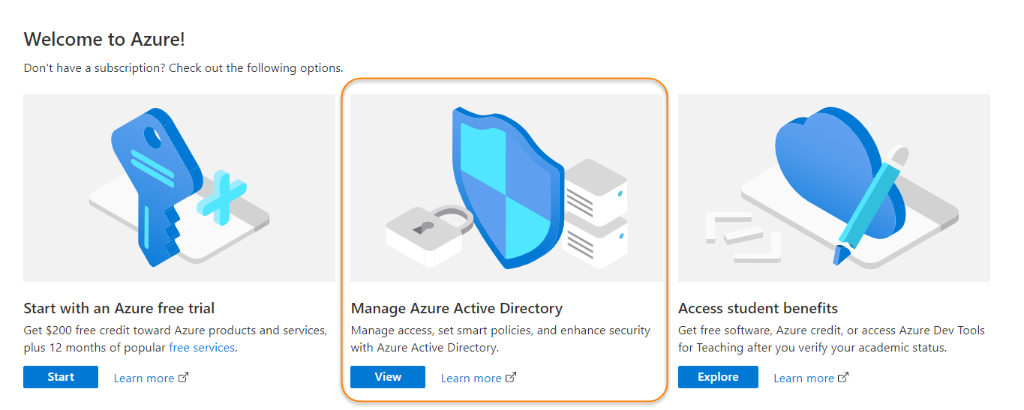
| 2. | Click on Manage Azure Active Directory.
| ||||||||
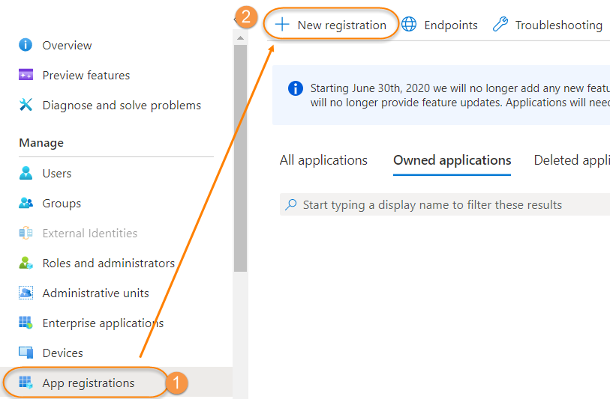
| 3. | On the left menu click on .
| ||||||||
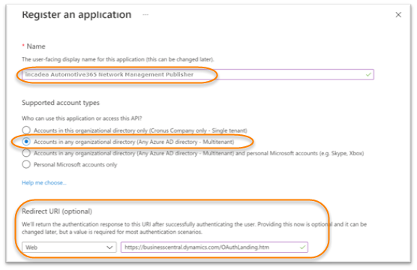
| 4. | Enter a name and account selection like the following:
| ||||||||
| 5. | Click on Register.
| ||||||||
| 6. | Click on . | ||||||||
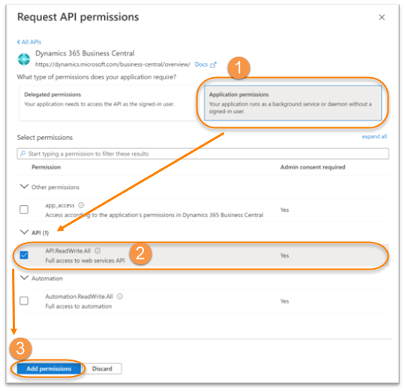
| 7. | Select the options as follows:
| ||||||||
| 8. | Click on Add permissions. The result should be like the following:
|

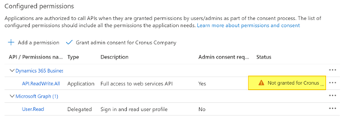
The permission status shows as not granted. In case the subscribers connect to the publisher and belong to the same organization (like in a multi-tenant environment), click on Grant admin consent. When the subscribers belong to another organization, this must be done in Business Central (see ⇘ Grant Consent).
To finish the registration of the application in Azure a secret needs to be created.
| 1. | Click on . |
| 2. | Select an expiration period (recommended 24 months which is the longest). |
| 3. | Click on Add. |
| Copy the secret (Client secret) and save it (the secret can only be copied once from here). The publisher will provide the Client ID and Client Secret to the subscribers so that they can connect to the application. |