 |
 Role Center
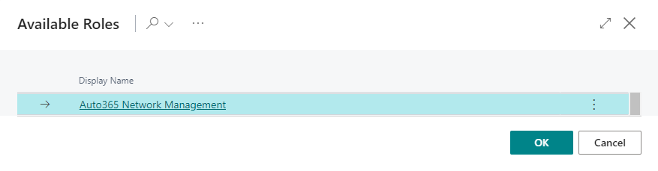
incadea Automotive365 Network Management comes with the Role Center:
- Auto365 Network Management
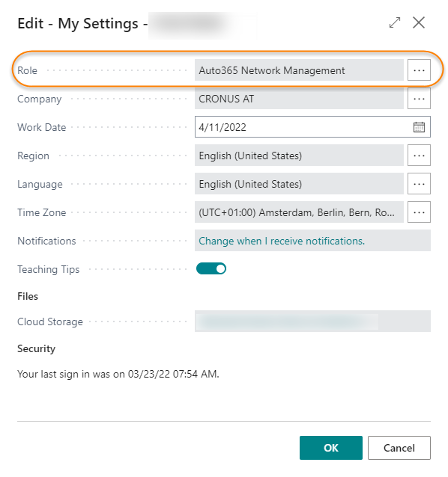
You can select the Role Center by clicking on . For the field Role select the one mentioned above.
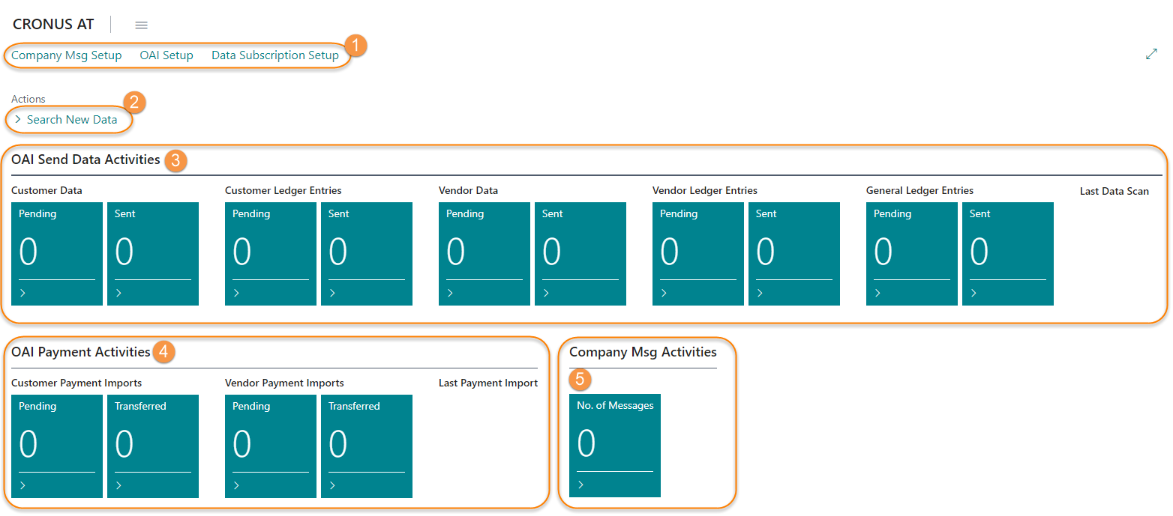
| ① | Open Setups |
| ② | Search for new Data |
| ③ | OAI Send Data Activities |
| ④ | OAI Payment Activities |
| ⑤ | Company Message Activities |
- Setups: here you can open the three different setups which are included in the app.
- Search New Data: by clicking on this action the system is searching OAI data.
- OAI Send Data Activities: For each available export option you can find 2 Cues: One for data which is pending and one for data, which has been sent. To check the data of the respective status, click on the cue to open a list.
- OAI Payment Activities: For each available import option you have a cue "Pending" and one "Transferred". To check the entries of each status, click on the cue to open the list with detailed information.
- Company Msg Activities: The cue indicated the number of messages available in the system. Click on the cue to open a list of all messages.
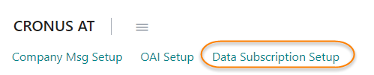
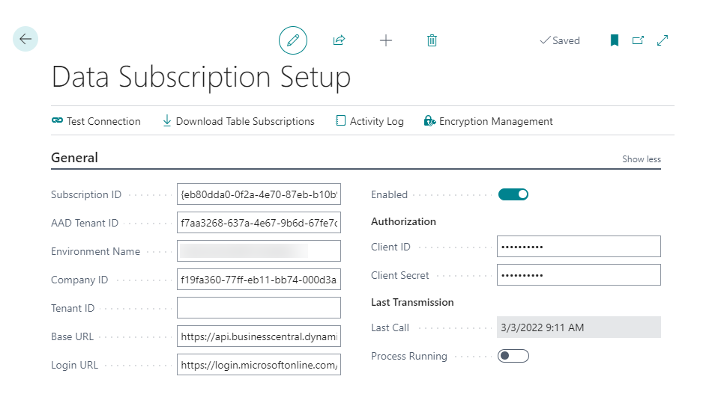
Data Subscription SetupWith the Data Subscription Setup it is possible to setup all necessary information to connect to the publisher and retrieve the data from the table subscriptions.
| 1. | Click on Data Subscription Setup on the Role Center page.
|
Field | Description |
|---|---|
Subscription ID | This is the Subscription ID provided by the publisher. |
AAD Tenant ID | This is the Azure Active Directory Tenant ID provided by the publisher. |
Environment Name | This is the Environment Name provided by the publisher. |
Company ID | This is the Company ID provided by the publisher. |
Tenant ID | This is the Tenant ID of the publisher in case of an multi-tenant environment. The value is provided by the publisher. |
Base URL | This is the Base URL to connect to the publisher's API. It is composed automatically using the Environment Name. It can be changed if needed but the default value should work in most cases. |
Login URL | This is the Login URL to authorize against the publisher's AAD Tenant ID. |
Enabled | By setting Enabled, the system will test the connection to the publisher. If it fails, Enabled is deactivated. It is also possible to test the connection by clicking on the action Test Connection on the Data Subscription Setup page. |
Client ID | This is the Client ID provided by the publisher. |
Client Secret | This is the Client Secret provided by the publisher. |
Last Call | This is the last time the process of downloading the table subscriptions has been run. |
Process Running | Set in case the process of downloading the table subscriptions is running. |
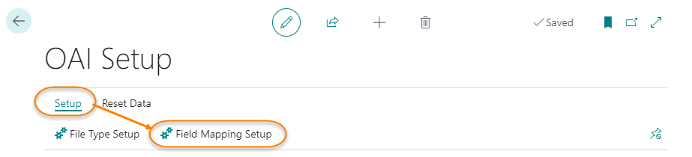
OAI Setup| 1. | Click on OAI Setup on the Role Center to open the setup page.
|
The following fields are provided:
Field | Description |
|---|---|
External Code LCY | Enter the external code which is used for the local currency. This value is used as the LCY code in the export files. |
Date Field Exchange Format | This field specifies in which format the date fields will be exported and later imported. The following options are available:
|
Customer | |
Payment Jnl.Template | Select the journal template to be used for posting customer payments. |
Payment Jnl.Batch | Select the journal batch to be used for posting customer payments. |
Bal. Account No. | Select the customer balance account to be used if there is no default balance account defined in the selected journal batch or journal template. |
Vendor | |
Payment Jnl.Template | Select the journal template to be used for posting vendor payments. |
Payment Jnl.Batch | Select the jurnal batch to be used for posting vendor payments. |
Bal. Account No. | Select the vendor balance account to be used if there is no default balance account defined in the selected journal batch or journal template. |
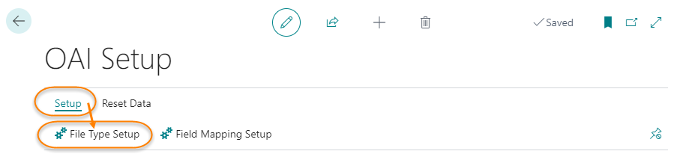
OAI File Type SetupThis setup is used for setting up OAI import and export files.
| 1. | On the OAI Setup page click on .
|
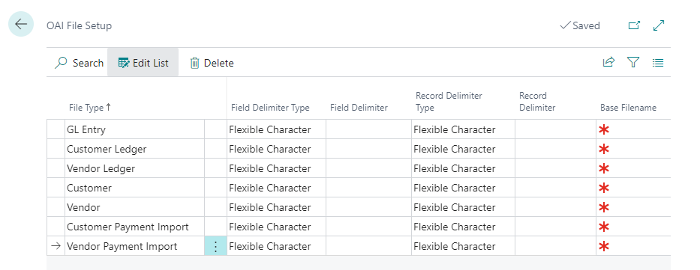
The following fields are provided to setup OAI import/export files:
Field | Description |
|---|---|
File Type | Enter the file type of the export. You can select the following options:
|
Field Delimiter Type | Select the type of the field delimiter. The following options can be selected:
|
Field Delimiter | Enter a character to be used as a delimiter between exported fields. For imports, this character will be used to define the end of a field. This only needs to be entered if you select Flexible Character as Field Delimiter Type. |
Record Delimiter Type | Select the type of the record delimiter. You can select between the following options:
|
Record Delimiter | Enter a character to be used as a delimiter between exported records. For imports, this character will be used to define the end of a record. This only needs to be entered if you select Flexible Character as Record Delimiter Type. |
Base Filename | Enter the import or export file name. This field is mandatory. |
OAI Field Mapping SetupThis setup is used to setup the mapping of internal accounting values to external values.
| 1. | On the OAI Setup page click on .
|
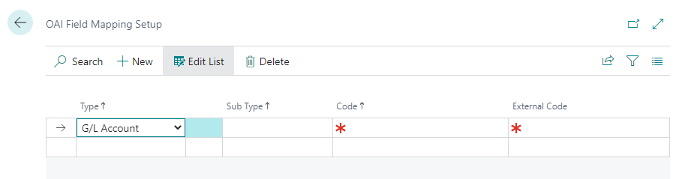
The following fields are provided to setup OAI mapping:
Field | Description |
|---|---|
Type | Select a mapping type. The options are:
|
Sub Type | Select a mapping subtype (only available if Bal. Account has been selected as Type). |
Code | Enter the intermal accounting value to be mapped to the External Code value. This field is mandatory. |
External Code | Enter the external value to replace the internal accounting value. |
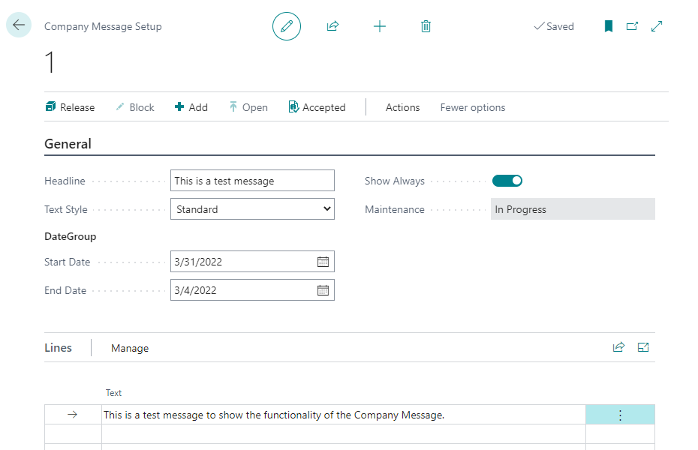
Company Message SetupTo setup the Company Message functionality perform the following procedure:
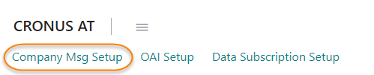
| 1. | On the Rolecenter page click on Company Msg Setup.
| ||||||||||||||
| 2. | Click on + to create a new company message.
| ||||||||||||||
| 3. | Fill the following fields:
| ||||||||||||||
| 4. | Enter your message in the Lines section. You can select a Text Style for each line, e.g. Headline in style strong, text in style standard. | ||||||||||||||
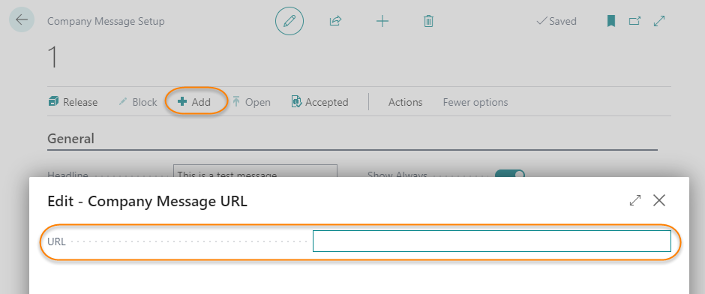
| 5. | You can also add a hyperlink by clicking on Add in the page menu.
| ||||||||||||||
| 6. | To send the Company Message and make it available click on Release on the page menu:
| ||||||||||||||
| 7. | To change the company message (e.g. spelling error), click on Block to set the message into Maintenance Mode. |


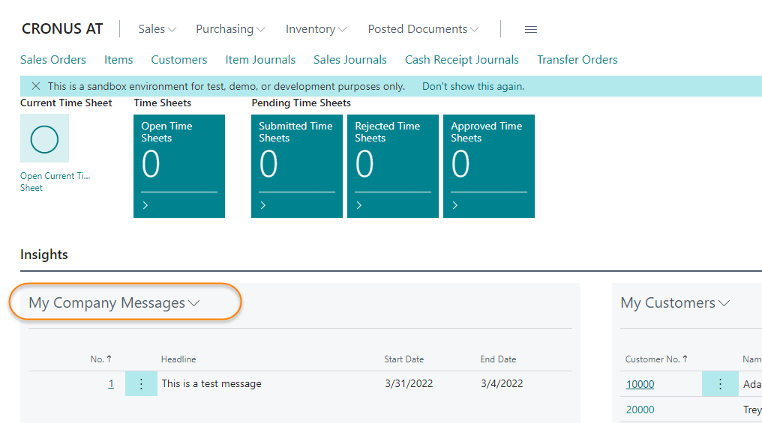
The Company Message is then available on the Microsoft Dynamics 365 Business Central Standard Rolecenter Sales Processor:
 Permission Sets
The incadea Automotive365 Network Management app includes the permission sets as follows:
 INCA365 COMPANY MSG.
This is the basic permission set related to the Company Message functionality. The aim of this permission set is to allow users to see the messages setup my an admin user. Since this functionality is optional in the app, in case the functionaltiy is used, this permission set must be assigned manually to the users or to a specific user group.
INCA365 DDSThis is the permission set related to the subscriber functionality. The aim of this permission set is to allow users to create and maintain the Data Subscription Setup, run the process to download the table subscriptions from the publisher and consult the related activity logs.
INCA365 OAIThis is the permission set related to the Open Accounting Interface OAI functionality. The aim of this permission set is to allow users to create and maintain the OAI Setups.
INCA365 NETWORK MGT.This is the admin permission set of the app. Technically, this permission set includes all previous described permission sets (company message, subscriber and OAI) and in addition it also includes the Auto365 Network Mangement Rolecenter and the logic to create and maintain message and run the OAI process.