 |
 How to set up incadea Automotive365 Connected Retail
.General Setup
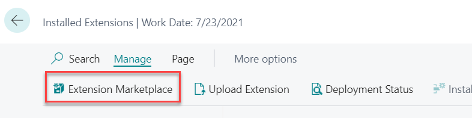
| 1. | Install the app from https://appsource.microsoft.com/en-us/marketplace/apps?product=dynamics-365-business-central or Search for Extension Management and on the page Installed Extensions, click , where you can then search for the extension.
| ||||
| 2. | The permission set should be assigned to the users, who will work with this app. | ||||
| 3. | Click the Search icon  on the upper right. on the upper right. | ||||
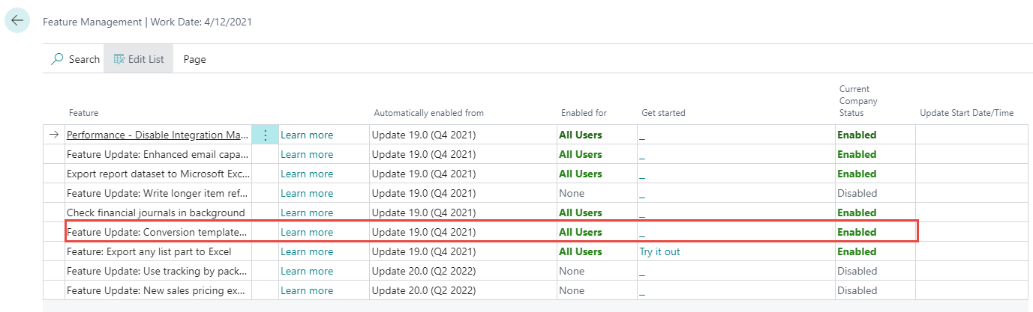
| 4. | In the search field, enter “Feature”. | ||||
| 5. | In the search results, click Feature Management.
| ||||
| 6. | “Enable” the feature Feature Update: Conversion templates for vendors and employees, and refactored templates for customers and items. | ||||
| 7. | Enable this feature for All Users. |
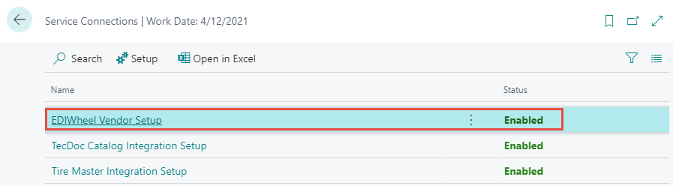
For the App incadea Automotive365 Connected Retail there are 3 different Setups available:
- TecDoc Catalog Integration Setup (see ⇘ “TecDoc Catalog Integration Setup”)
- EDIWheel Vendor Setup (see ⇘ “EDIWheel Vendor Setup List”)
- Tire Master Integration Setup (see ⇘ “Tire Master Integration Setup”)
 | A RapidStart Package, which sets up default values, can be run by your IT department or requested by us if needed. |
| Install the Base app along with the Connected Retail app. |
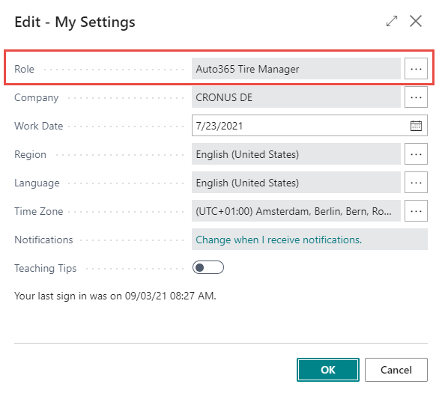
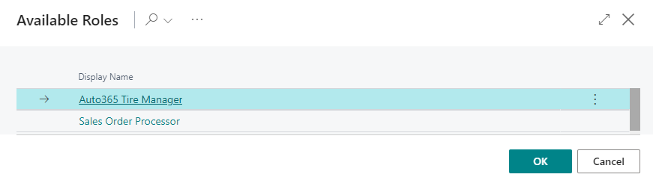
Role Centersincadea Automotive365 Connected Retail operates with two Role Centers:
- Sales Order Processor Role Center Extension for TecDoc
- Auto365 Tire Manager for EDI Wheel and Tire Master Data
You can select the Role Center by clicking on . For the field Role Center select the one of the mentioned above.

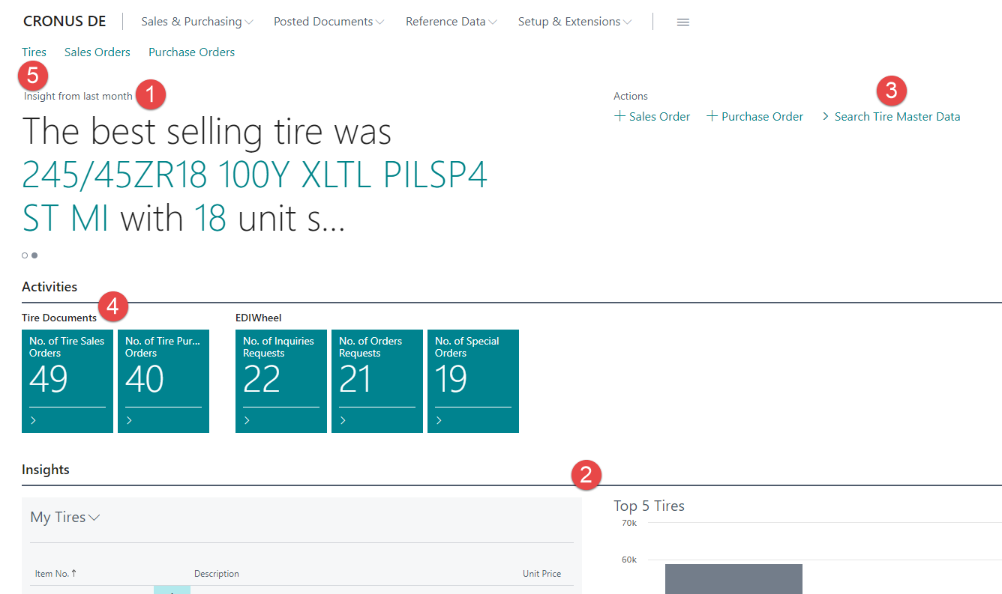
① Best selling tire headline
② Top 5 Tires chart
③ Search Tire Master Data directly from Role Center
④ Open lists of tire sales and purchase orders from the Role Center
⑤ Open the tires list from Role Center
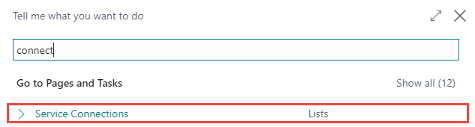
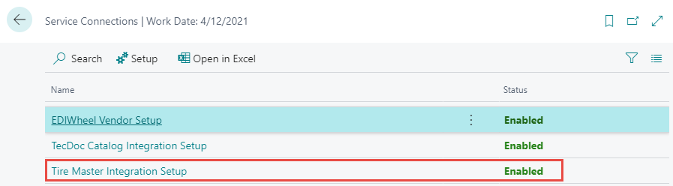
TecDoc Catalog Integration Setup| 1. | Search for Service Connections.
| ||||||||||||||||||||||||||||||||||||||||
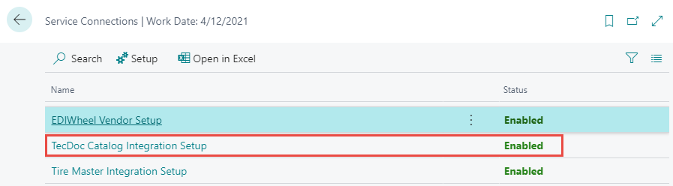
| 2. | Click on TecDoc Catalog Integration Setup
| ||||||||||||||||||||||||||||||||||||||||
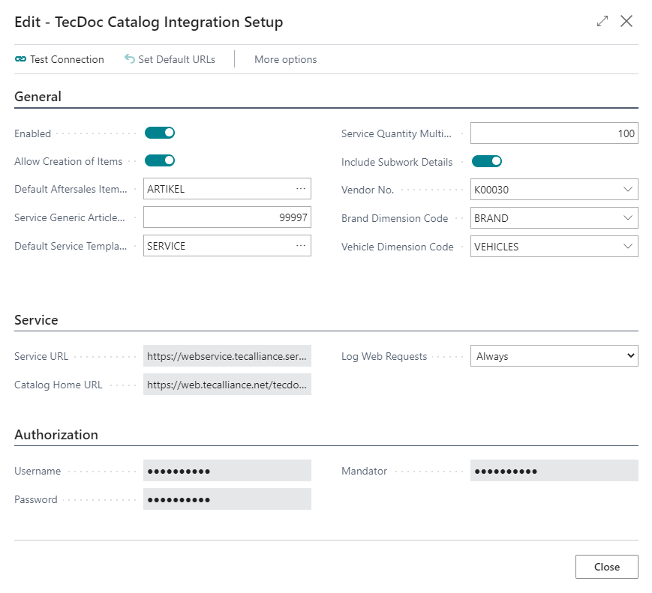
| 3. | Make sure, that the following values are filled in: Table 1: .General FastTab
Table 2: .Service FastTab
Table 3: .Authorization FastTab
|
.Open Activity Log
| 1. | To open the Activity Log click on the Setup card.
|

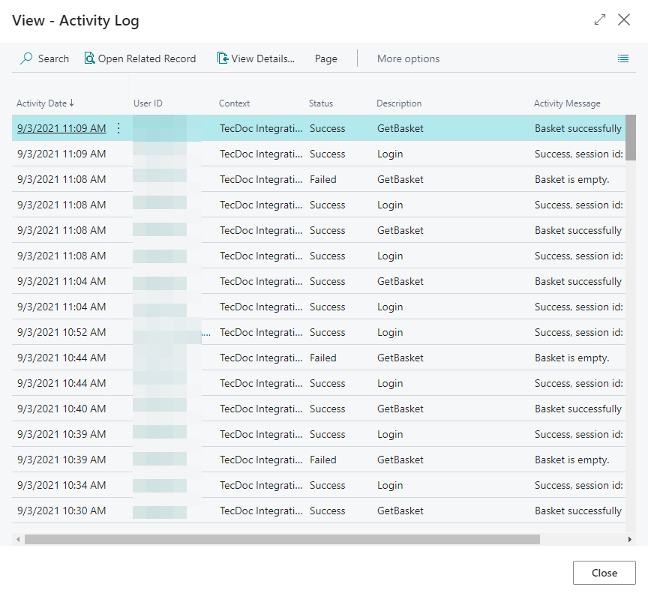
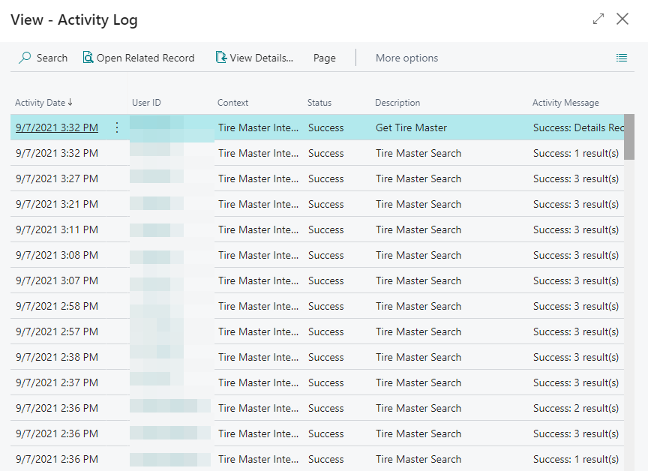
In this Log all sessions (inquiry, import Basket etc) is stored. Here you can see if a transmission has been successful or if any error occured.
| This page appears empty right after Setup. Once workflows are done, this page will fill with entries. |
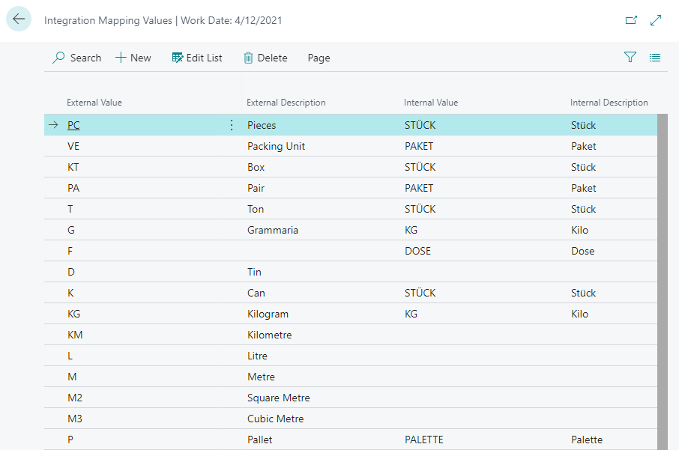
.Open Integration Mapping
| 1. | To open the Integration Mapping click on the Setup card.
| ||||||
| 2. | Create the mapping you need by filling the fields and selecting the Target Table ID. In the field No. of Mappings click on the number.
| ||||||
| 3. | Enter all the values you need to setup the mapping. |


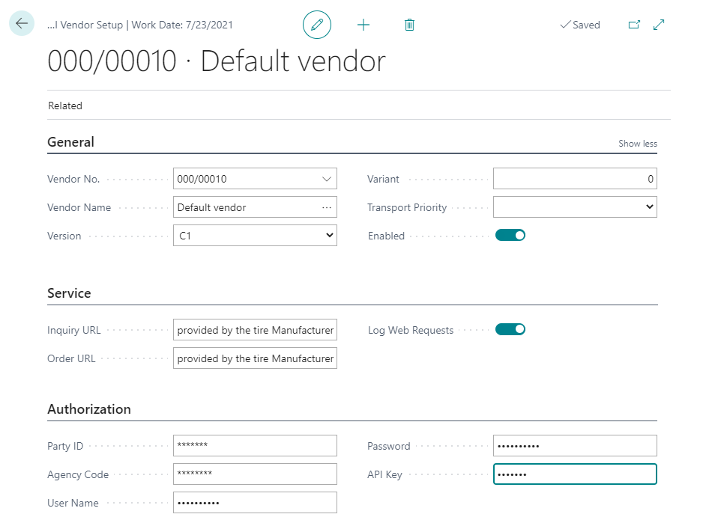
 EDIWheel Vendor Setup List
| 1. | Search for Service Connections.
| ||||||||||||||||||||||||||||||||||||
| 2. | Click on EDIWheel Vendor Setup | ||||||||||||||||||||||||||||||||||||
| 3. | Make sure, that the following values are filled in: Table 4: .General FastTab
Table 5: .Service FastTab
Table 6: .Authorizaton FastTab
|
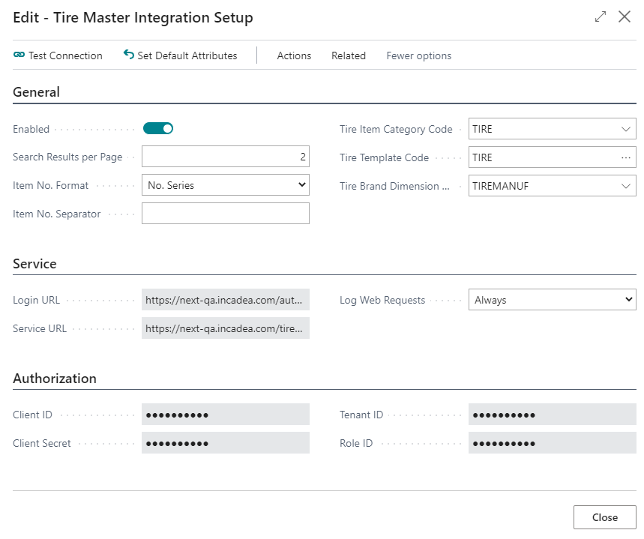
 Tire Master Integration Setup
| 1. | Search for Service Connections.
| ||||||||||||||||||||||||||||||||||||
| 2. | Click on Tire Master Integration Setup
| ||||||||||||||||||||||||||||||||||||
| 3. | Make sure, that the following values are filled in: Table 7: .General FastTab
Table 8: .Service FastTab
Table 9: .Authorization FastTab
|
.Open Activity Log
| 1. | To open the Activity Log click on the Setup card.
|
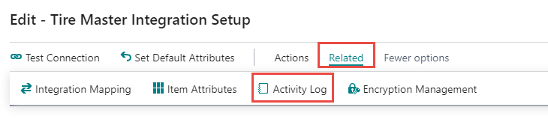
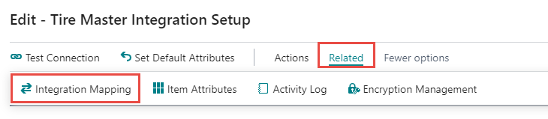
.Open Integration Mapping
| 1. | To open the Integration Mapping click on the Setup card.
| ||||||
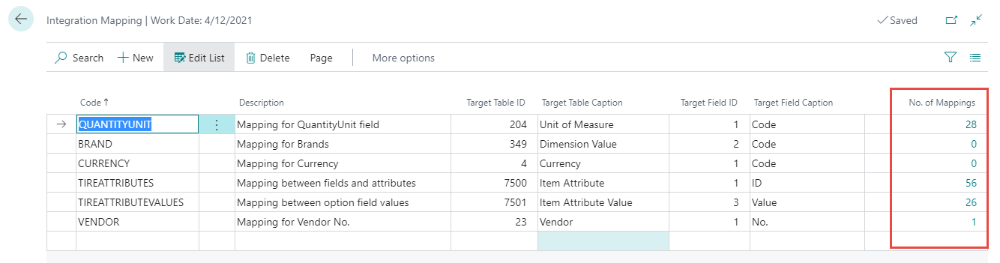
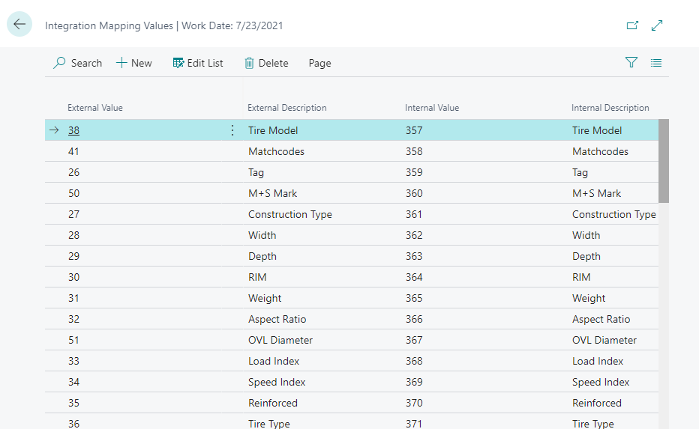
| 2. | Create the mapping you need by filling the fields and selecting the Target Table ID. In the field No. of Mappings click on the number.
| ||||||
| 3. | Enter all the values you need to setup the mapping. |
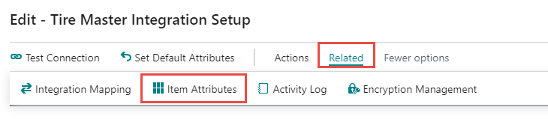
.Item Attibutes
| 1. | To open the Item Attributes click on the Setup card.
|
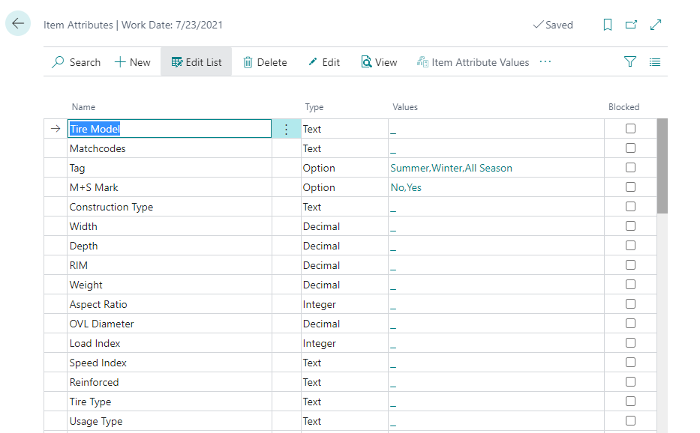
| The system automatically created the default values for the item attributes on this list. This is triggered by the Set Default Attributes action on the setup. By running the RapidStart-Package while installing this functionality, this action is not needed. |