 |
 Aftersales Activities Cues
 | This process is done on the Aftersales Backoffice Rolecenter. |
The import of documents and data is triggered by incadea Connection, as soon as you have Enabled the Aftersales Integration in the Setup. You can see the number of imported transactions on the Role Center page in the Aftersales Activities section on the In Progress cues.
The cues represent the progress of the Aftersales Activities through the main stages of the Aftersales processes. When finalized, the activities are moved to Archived.
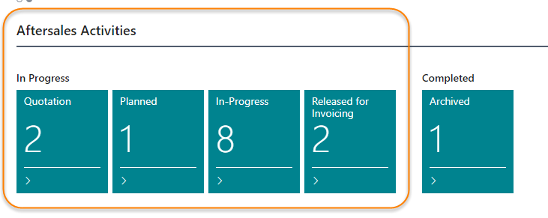 Aftersales Activity Overview
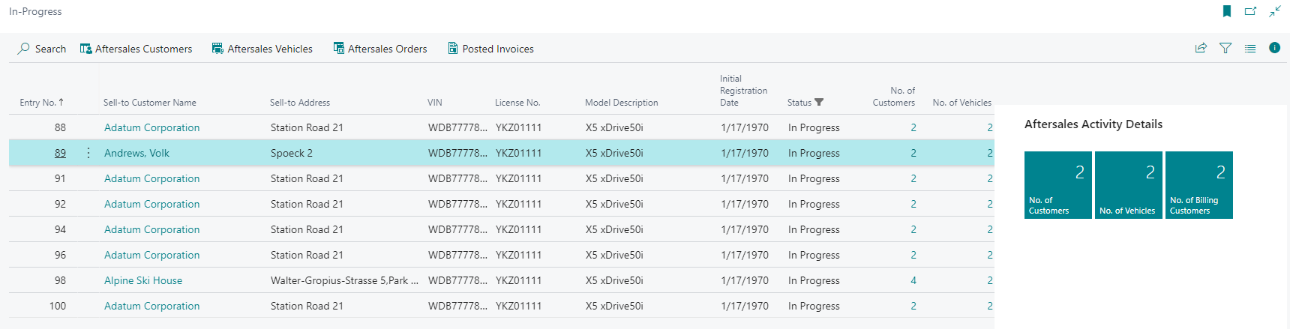
By clicking on a Cue the user can access the underlying Aftersales Activities list, where each Aftersales Activity represents end-to-end aftersales process, starting when the customer ask for an appointment or quotation for servicing a vehicle, and ending after the vehicle has been serviced and all administrative tasks including invoicing are fulfilled.
For each activity this page shows a combination of the essential Customer and Vehicle information useful to the user for quick identification; furthermore Cues allow quick link to the master data connected to the Aftersales Activity.
 Aftersales Order
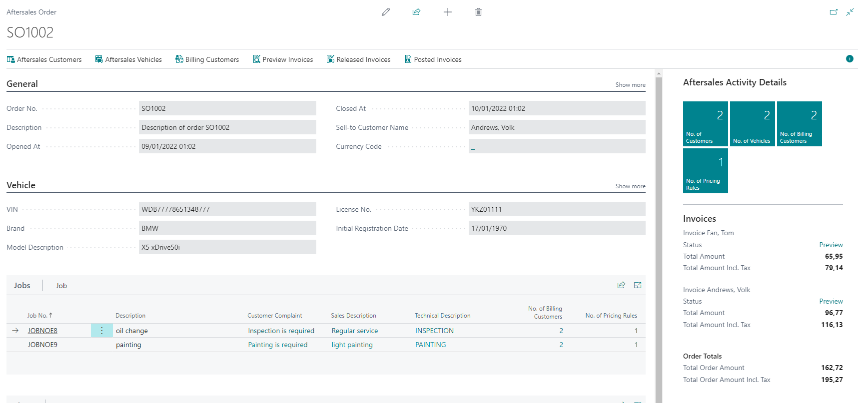
The scope of the Aftersales Activity is defined in detail by means of one or more Aftersales Orders which are listing in detail parts and labor and misc. items needed to service the vehicle.
The user can access orders linked to an Aftersales Activity by clicking on the Aftersales Order action.
The structure of the Aftersales Order is very close to a Business Central standard document, however its structure is enhanced on three levels by introducing Aftersales Jobs as automotive industry standards require.
 Aftersales Job
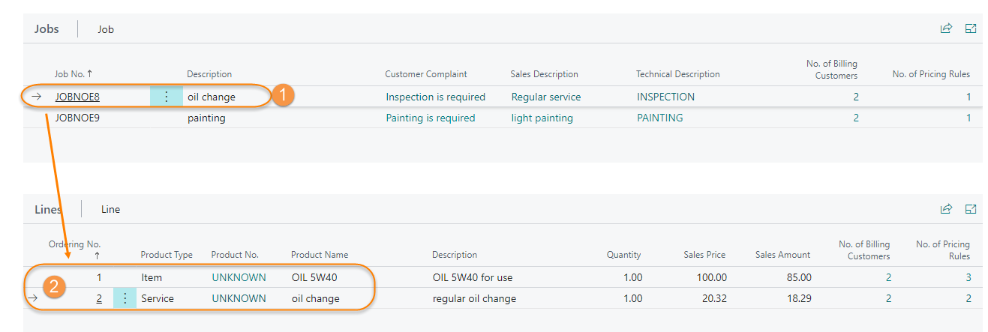
Each Aftersales Jobs is meant to describe a request or a complaint from the end customer and allows to clearly identify items, labor and misc. items required to restore the vehicle.
Structuring the aftersales orders scope using Aftersales Jobs is useful to facilitate workshops internal processes, but is also a good way to make the end customer understand the content of the repairs done on the vehicle and more important its pricing.
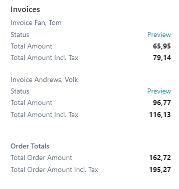
As the Aftersales Order defines also the content for invoicing, it offers a quick overview showing the number of invoices which are generated from the Aftersales Order and total amounts for each.
Invoices are generated automatically as soon as an Aftersales Activity including Aftersales Order(s) are received. The invoicing process follows three specific stages:
- Preview Invoice: the invoice is pre-calculated but not approved for posting by Aftersales Backoffice.
- Released Invoice: the invoice is checked and ready for posting (release is performed by Aftersales Backoffice).
- Posted Invoice: the invoice is posted and when all invoices are posted, the Aftersales Order is usually completed and archived.

 Process Pending Documents
 | This process is done on the Aftersales Backoffice Rolecenter. |
On this step, the Aftersales Backoffice in BC controls the finalization of the aftersales process by releasing the invoices after being checked first.
When a document to be released is imported, a notification bar is shown on the Aftersales Backoffice Rolecenter.
| 1. | On the Aftersales Backoffice Rolecenter click on Open Pending Documents on the notification bar.
| ||||||||||||
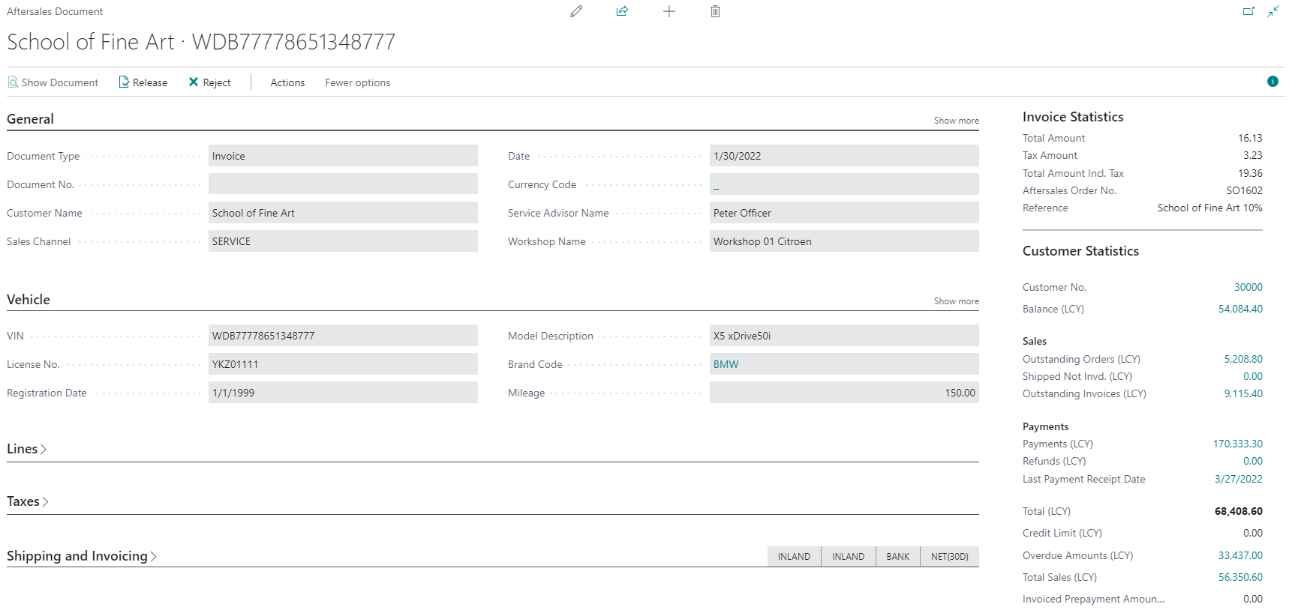
| 2. | Click on Document Type Invoice to open it for checking.
| ||||||||||||
| 3. | After checking all the information on the invoice, close this aftersales document and go back to the Aftersales Document List. | ||||||||||||
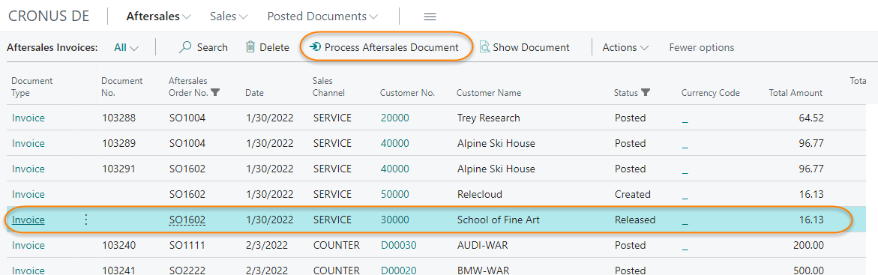
| 4. | Select the invoice and release or reject it by clicking on the respective action on the menu:
| ||||||||||||
| 5. | If you have set up, to automatically process released documents, no further action is required. The documents are scheduled automatically to be posted. | ||||||||||||
| 6. | If you don't have enabled this function go back to the rolecenter and click on the main menu.
|


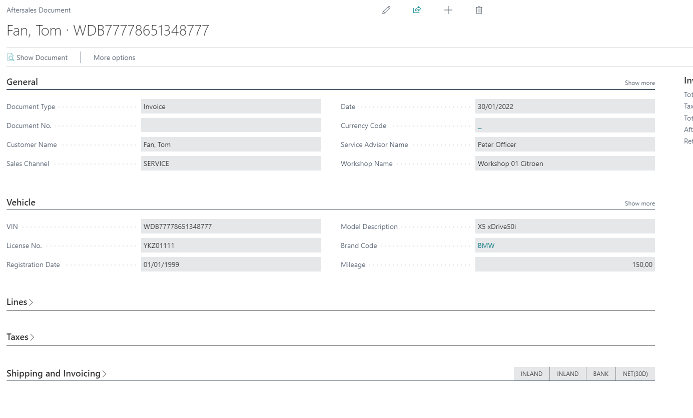
 Check Posted Aftersales Documents
| 1. | On the Rolecenter click on
| ||||||
| 2. | If you select one line and click on Show Document the document opens.
| ||||||
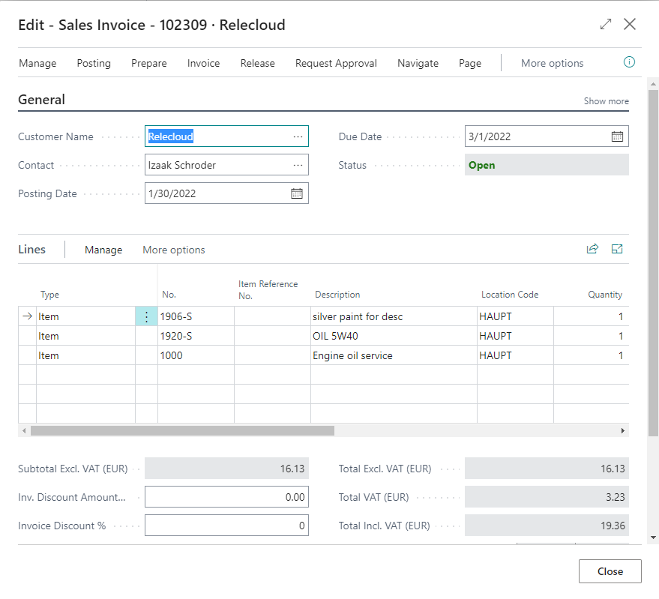
| 3. | If you click on Document Type Invoice on the list page, the invoice also opens:
|


 Aftersales Manager RC
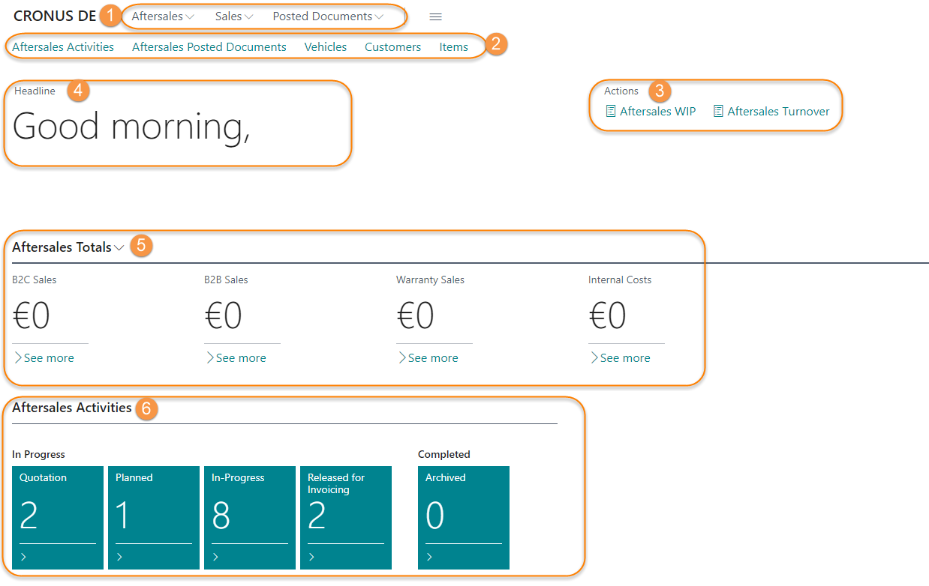
① Aftersales Navigation Menu
② Aftersales Navigation Bar
③ Aftersales Reports
④ Aftersales Headline
⑤ Aftersales Totals
⑥ Aftersales Activity Cues
The Aftersales Manager Rolecenter is showing KPIs and links to reports. The focus in this Rolecenter is on amounts.
On Reports you have access to Aftersales WIP and Aftersales Turnover:
- The Aftersales WIP report shows the expected value of aftersales activities in progess but which are not finalized yet. The work in progress is shown in a matrix layout, split by branch, customer type and type of sales.
- The Aftersales Turnover report shows a breakdown of the revenues of the aftersales area in a matrix layout, split by branch, customer type and type of sales.
For a detailed description of the reports, please see ⇘ Reports.