 |
 Working with TecDoc
With the integration of TecDoc it is possible, to call the TecDoc Catalog 3.0 page directly from the Sales Order or Sales Quote, select and order an item there and import it to the Sales Order or Sales Quote in Business Central.
| 1. | Open a new Sales Order or Sales Quote and fill in the customer details. | ||||
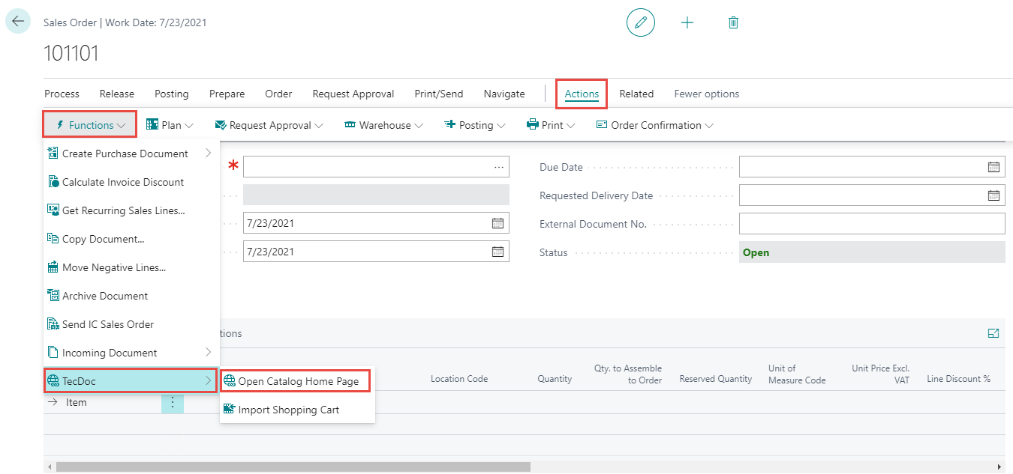
| 2. | On the menu ribbon, click on
| ||||
| 3. | Look up the item(s) and labor(s) you need like you are used to and add it to the shopping basket. | ||||
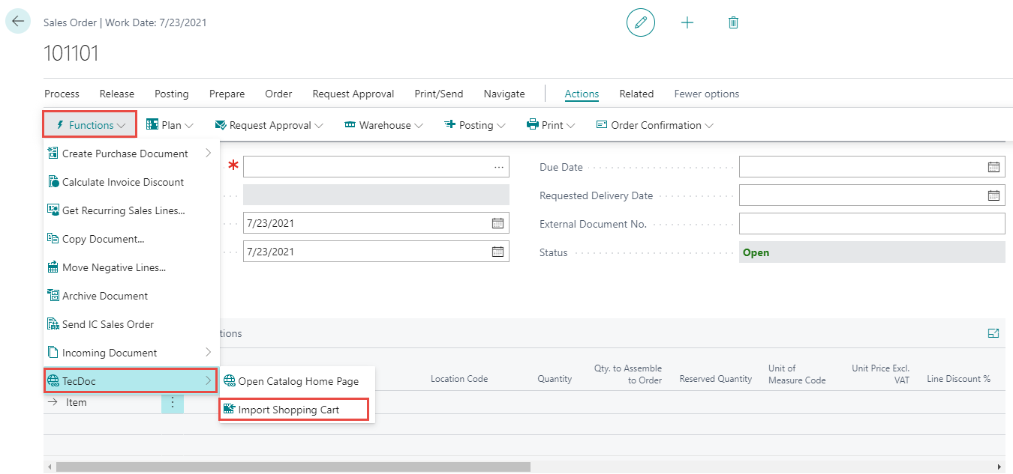
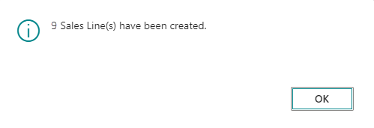
| 4. | Back in the Sales Order or Sales Quote in Business Central, add the online shopping basket to the sales lines by clicking on .
| ||||
| 5. | Finish the sales process by posting the Shipment and Invoice. |

 | The TecDoc Integration can also be triggered directly from the Role Center page, where instead of creating sales lines, the process just created items, ready to be used for any sales process afterwards. |
Working with EDIWheelWith the integration of EDIWheel it is possible, to send an inquiry for tires directly from the Sales Order in Business Central.
| 1. | Open a new Sales Order and fill in the customer details. | ||||||
| 2. | Fill in the tire, which is requested by the customer in the Sales Lines.
| ||||||
| 3. | Make sure, that in the General FastTab, the field for Requested Delivery Date is filled. | ||||||
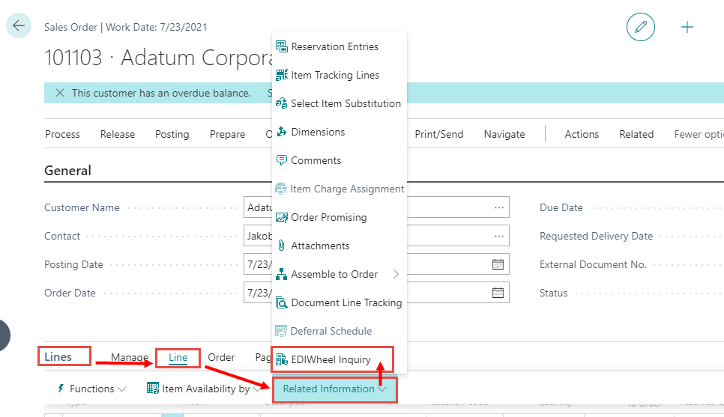
| 4. | To send the inquiry for the tires in the sales lines click on in the Lines section.
| ||||||
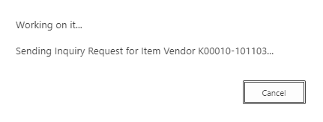
| 5. | The system is sending the Inquiry Request to the vendor.
| ||||||
| 6. | Once the inquiry was successful, send an order request to the vendor by clicking on Request Order. | ||||||
| 7. | When the order is received then the system asks automatically for Purchase Order creation. Before you can put the tire item(s) to a sales document, you need to receive the quantity in the system. Click on and make sure, that the request to the vendor is successful. Based on the color of the line you can see the status:
| ||||||
| 8. | Finish your Sales Order by posting the Shipment and Invoice.
|

After a Sales Order header is deleted after being fully posted or then the order is aborted, the Ordering Entry is deleted.
EDIWheel Requests and Orders OverviewOn the Role Center Tire Manager you can see the cues for EDIWheel:
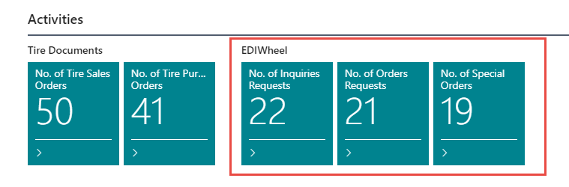
If you click on one of them, a list page opens, where you can see either Inquiry Requests, Order Requests or Special Purchase Orders. If for example a Inquiry Request was not successful during the creation of the Sales Order and you want to send the request again, click on the failed request on the list page and send it again. The same action can be done on the page for Order Requests.
On the list page for Special Purchase Orders all created Special Purchase Orders are listed. Once, the Sales Order for an item in this list is transferred to a Sales Invoice and posted, the entry is deleted from these lists.
 Tire Master Data
With the integration of Tire Master Data and the Role Center Tire Manager you can manage the following actions for a selected tire size:
- See all Tires which are available in your stock
- Retrieve the tire list from a Master
- Check the technical details and prices. Select the needed tire(s).
- Add tires to the sales order and proceed with the familiar Business Central workflow
- Add tires to the purchase order and proceed with the familiar Business Central workflow
| 1. | On the Role Center click on Tires
| ||||||
| 2. | Search for a tire there by clicking on Search and entering the detail of the needed tire (e.g 215/45). | ||||||
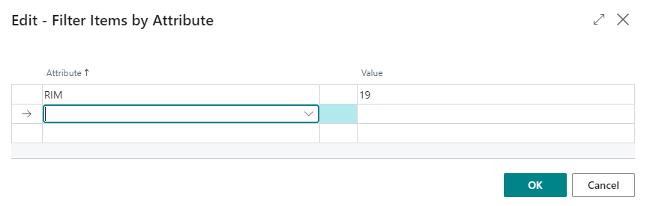
| 3. | If the tire you are looking for is not found click on .
| ||||||
| 4. | Click OK to apply the filter to the tire list. | ||||||
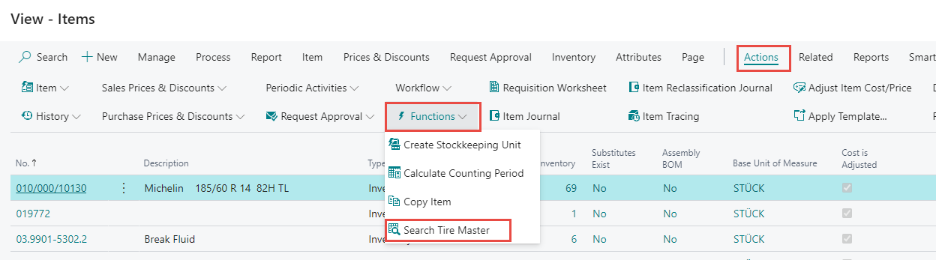
| 5. | If the tire you are looking for is still not there you can call the Tire Master Search by clicking on .
| ||||||
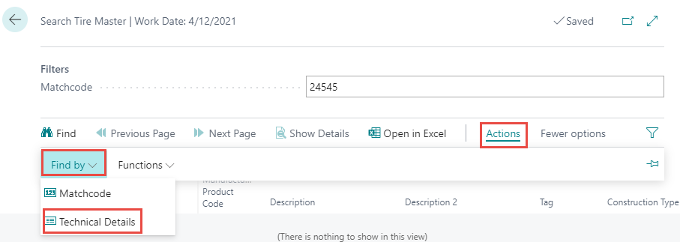
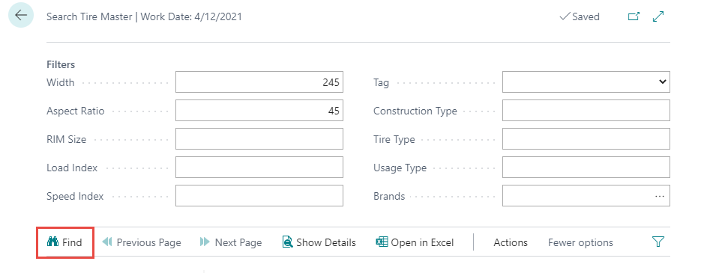
| 6. | On this page you can search for a tire in the Tire Master by (1) Matchcode or 2) Technical Details. To select the search type click on and select your search method. | ||||||
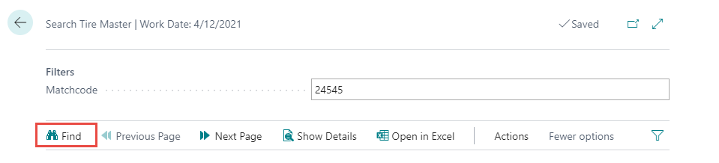
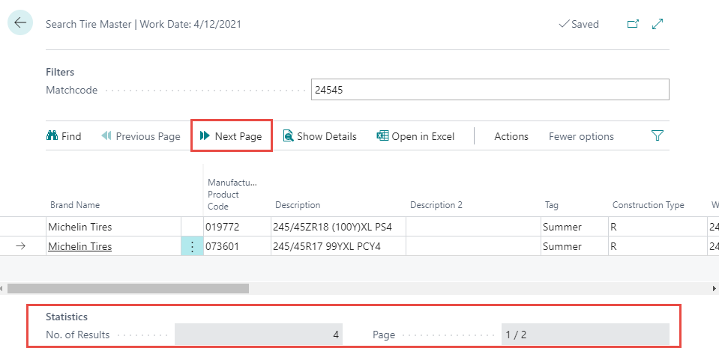
| 7. | Enter a matchcode (for Matchcode Search) or a select a filter (for Search with Technical Details). | ||||||
| 8. | Click on Find to start the search in the Tire Master.
| ||||||
| 9. | If there are more results (you can see the No. of Results in the Statistics section at the bottom of the page) click on Next Page. The total pages and total No. of Results, which are available are also shown in the Statistics section.
| ||||||
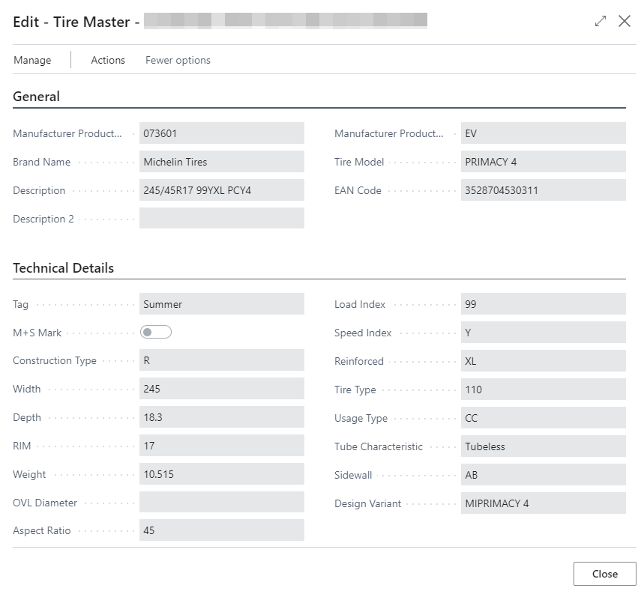
| 10. | If you found the tire you need, select the item and click on Show Details to retrieve all the details for the selected tire.
| ||||||
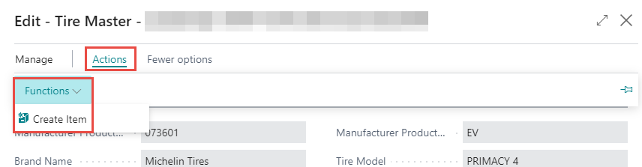
| 11. | If this is, based on the details, the tire you need, click on to create this tire as item in your system.
| ||||||
| 12. | The system ask you if you want to open the Item Card, if the item already existed. If the item has been just created, the Item Card opens automatically and all attributes are assigned. | ||||||
| 13. | Once the item is created you can add it to any Sales Order or Purchase Order in the application. |